


The oven restoration has begun. It is an absolute joy to uncover the secrets of this old beauty. In a previous blog I provided some of the history of the oven and bakery, in summary the oven was built in 1895 and remained in continuous use until the early seventies when it fell victim to mass produced stodge.
Normal 0 false false false EN-US X-NONE X-NONE /* Style Definitions */ table.MsoNormalTable {mso-style-name:"Table Normal"; mso-tstyle-rowband-size:0; mso-tstyle-colband-size:0; mso-style-noshow:yes; mso-style-priority:99; mso-style-parent:""; mso-padding-alt:0cm 5.4pt 0cm 5.4pt; mso-para-margin:0cm; mso-para-margin-bottom:.0001pt; mso-pagination:widow-orphan; font-size:12.0pt; font-family:Cambria; mso-ascii-font-family:Cambria; mso-ascii-theme-font:minor-latin; mso-hansi-font-family:Cambria; mso-hansi-theme-font:minor-latin; mso-ansi-language:EN-US;}
Despite sitting in silence for the better part of 40 years the oven is in remarkably good condition. The first task is “Discovery”, cleaning up and scratching the surface to see what is underneath.
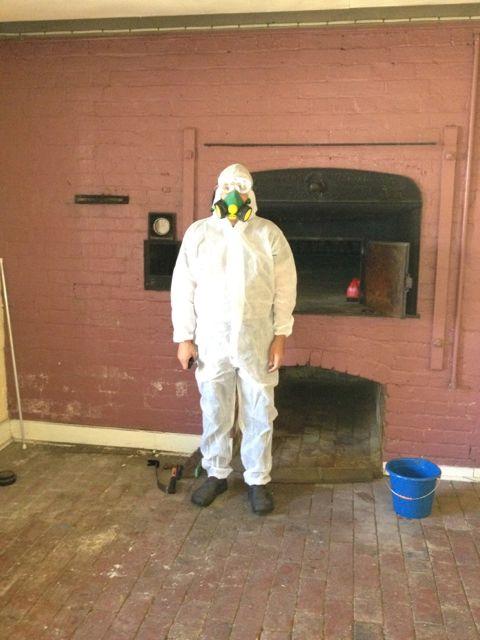
The oven was full of ash, dust and soot, which meant putting on a teletubby suite, a darth vader mask and climbing inside.

After two days crawling about with a brush and shovel the oven revealed itself. This photo is from the back of the oven, what the bread sees :)

The brickwork is generally in good condition, with some crumbling on the fire box side.
The floor tiles are a mixed bag, the majority are in reasonable condition but some are worn.

In the roof are a couple of tons of sand creating additional thermal mass. (It took some mental fortitude to ignore the tons of sand above my head when I was crawling around inside.)

Next to the firebox are four copper pipes. These pipes feed up to a copper boiler in the roof (see phot above), which would have provided hot water to the bakery and home.

I have enormous gratitude and admiration for the oven builders. Even after 120 years, including 40 years of neglect, the oven is still functional and with a little bit of tender care it will live on for another 120 years.
Edited:
This weekend we fired the oven for the first time to begin the slow process of removing the moisture.

Replies
Thank you for sharing the pictures TimmyB. What an incredible asset you have there! I look forward to hearing more about the oven.
What are you planning to do with it when you finish cleaning it up?
Terri
Another joyful weekend working on the oven. The first job was to remove the cast iron damper used to regulate the air flow in the chimney. The combination of rust, a centuary of chimney dust and fallen bricks had locked the damper firmly in place. Up until now I have been very careful with the old oven, gently repairing what I could, but the stuck damper called for some brute force. A combination of a crowbar, some blocks of wood and a metal hook did the job.
With the damper removed the next job was to sweep and clean the chimney. Then return the damper, with the rust removed.
And now for the most exciting part of the weekend. It was time to begin a light firing of the oven. Starting the slow process of removing the moisture.
A baker freind of mine who also has a lovely old scotch oven said that when you first fire these ovens after years of neglect they "cry". Sure enough the oven did cry, oh so gently, as moisture began to weep from the bricks and iron. Who new that the relationship between a baker and his oven could become so personal and emotional.
Hi Tim,
I`m a friend of Barbel`s and she sent me your link, I`m so glad she did, it`s great.
I spent the weekend with my dad, who made a pizza oven in his backyard. He hadn`t used it much and fired it up on Sunday as we had made some sourdough. When we scraped the coals out to even up the oven temp. we noticed then water coming from the bottom of the oven, we were both bemused as to why this was happening.......so now I can put dad`s mind at ease.
So, we made 2 half loaves with olives and lemon zest, 1 loaf with carraway seed and 2 plain, they all looked great and tasted even better. The oven was still at a great temp. so we through in a pork roast and some home grown potatoes and herbs which was ready in time for dinner!! AND dad had so many cherry tomatoes he cut them in halves and put them in the oven to dry out over night. I love cooking with this oven and spending quality time with my dear dad.
I look forward to watching your progress with the bakery. Barb`s going to take me for a drive up there one day.
Leanne.
Hi Leanne,
I look forward to seeing you and Barbel in Nathalia. Your dad's oven sounds like it is a real performer. It is fantastic that it holds the heat so effectively. When reading what you cooked my tummy starting to rumbling.
Warmest Regards,
Tim
I've taken over building a double sided scotch oven for a friends farm stand. There is very little info out there then I stumbled on your restoration project!! I was wondering if you could provide me with some dimensions from your oven. I have the base built and am now trying to design the oven, chimney, firebox etc... Any help would be greatly appreciated.
regards,
jeff
Hi Terri,
We are slowly restoring the bakery and home with the goal of running the property as a guest house where people can come and learn to bake sourdough.
Warmest Regards,
Tim
All the best to the cleaning job and lots of good wishes for your future plans.
Hello I have an oven the same as yours,My Damper is also stuck closed.
How did you free it up?
I have dismantled the chimney and can touch the damper but cant free it up.
Do you know if the damper slides in and out or rocks from side to side?
Best Matt
Hi Matt,
The Damper had the best of me, in the end I called my father who is a life long farmer with a fair dose of farmers ingenuity.
We started by using a hacksaw blade to loosen the rust between the damper and the metal sleeve. I then squited some WD40 in the gap between the sleeve and damper.
My father had two suggestions to get the sleeve out, both fairly extreme. 1) Use a crowbar with some blocks of wood to get leverage , and 2) Use a hydrolic jack. In the end we the crowbar did the job. The damper pulls straight out of the wall, through the iron sleeve set into the bricks.
We started by bending an old tent peg to hook through the hole at the end of the damper and create a loop for the crowbar to hook onto. Next we placed several blocks of wood above the damper, against the brick wall (we needed a couple pairs of hands), pushed the crowbar up through the loop attached to the end of the damper and then pulled on the botton of the crow bar. This created an incredible amount of leverage and bit by bit the damper gave way. As the damper released we needed to add additional wooden blocks to maintain the leverage.
I hope this is helps.
Warmest Regards,
Tim
PS Where is your oven? Do you have any photos?
Hi Tim Thanks for that
I am in Bowning NSW, Am not sure if yours is the same Damper will up load some photos soon.
The handle is snapped off my damper ,but it looks as if it had a thread on it.
Thanks again Matt
Hi Matt Crosbie.
I'm in Eugowra and my partner and I have purchased the old bakery. We come past Bowning annually on our way to the snow. I wonder if you might be willing to show us your oven next time we are coming past? Our old girl hasn't been used for nearly 40 years but the heritage officer said its in the best condition that he has seen so we are hoping to get her fired up again once we dispose of the diesel flame thrower.
Cheers
Josh
I ready with envy about your big adventure restoring a lovely old oven and can't wait to hear about the first loaves from its rebirth. Please be sure to post the info about your guest house/sourdough workshop activity as soon as you're ready to run with it! It would be the trip of a lifetime for a USA gal.
Kathy
Hi Tim
Another great restoration. Keeping it real for the future. Good on you.
The photo looking out from within. On the left is the fire box. When you make your fire - it is the flames that curl into the oven vaultfrom that fire box -right ? Where is the chimney?
Is there an opening from the fire box that allows heat to the undersde of the oven floor. (I have seen ovens that do this) Just wondering ????
Facing the oven.....on the left you have a small door. What's that for? Then from the inside looking out- to the right of that, you have another cubby hole - what's that for?
Do you think that you could sketch out the plan of the oven and how it works ? If it's not too much to ask.
Basic sizes of interior- width and depth, height etc.
There are no notes or plans on the net that refer to this. Dead art ! SO sad !
I am in the process of building my own oven that is based on the old Scotch ovens. But there are no reference points to work off other than some old photos and second hand info. Very difficult to re engineer without notes or plans.
Thanks a ton.
Great post btw. where is part 3/4/5/6/7/8/9/ ??? lol
Hi Polenta,
If you send me an e-mail address I may be able to help. I have copies of some Blueprints that I got from a museum that details a "Small and Shattell" oven. If you are building your own oven I would love to talk as I am thinking of doing the same.
Cheers
I have just come across this forum and are in the planning stage of building my own oven. I would love to get a copy of those blueprints if they are available.
thanks in advance Craig
Willuamstown Melb
I have just started to restore/ bring back to working order my scotch oven. Yesterday I cleaned out the shed an crawled into the oven to sweep it out. I am not entirely happy about confimed spaces so this was a challenge for me.
The bricks are in fairly good nick; and my oven, like most of the others on this blog has not been used for around 40 years.
I lit a small fire as an experiment but the damper is firmly stuck shut. I will try a crowbar or a block and tackle to free it. As a last resort I will demolish the chimney to access the damper and repair or replace it unless anyone has any useful suggestions about freeing it.
I am very glad that I found this online community. I am very keen to re-establish my bakery in the small town of Penshurst, Victoria (500 people) where I live.
I think that initally I will open my bakery up to the community for a weekly bake up. Anyone interested could come and bake their week's worth of bread. A co-opperative model is also something I am considering but thats all in the future after I get the damper free and moving again.