As those who have been reading my blog here with any sort of regularity will know, I've been happily cultivating a sourdough starter and trying to learn how to bake real artisan-style naturally leavened (sourdough) bakery bread for several months.
Moreover, I've been trying to perfect my sourdough recipe for everyday, standby bread that would go with most things and that T would absolutely love (it's an important criterion!). My first decently successful attempt was eaten happily some weeks ago, however as I've mentioned back then, it wasn't really a recipe, but rather a work in progress - progress which continued through the purchase of a banetton, a trip to the Stockholm Essencefabriken to buy some traditional Swedish bread spices, and a rummage through my dishware for the appropriate cast-iron dutch oven to bake it all in. Then there was the frantic posting back and forth on sourdough forums with questions regarding proofing, and then there was another attempt...
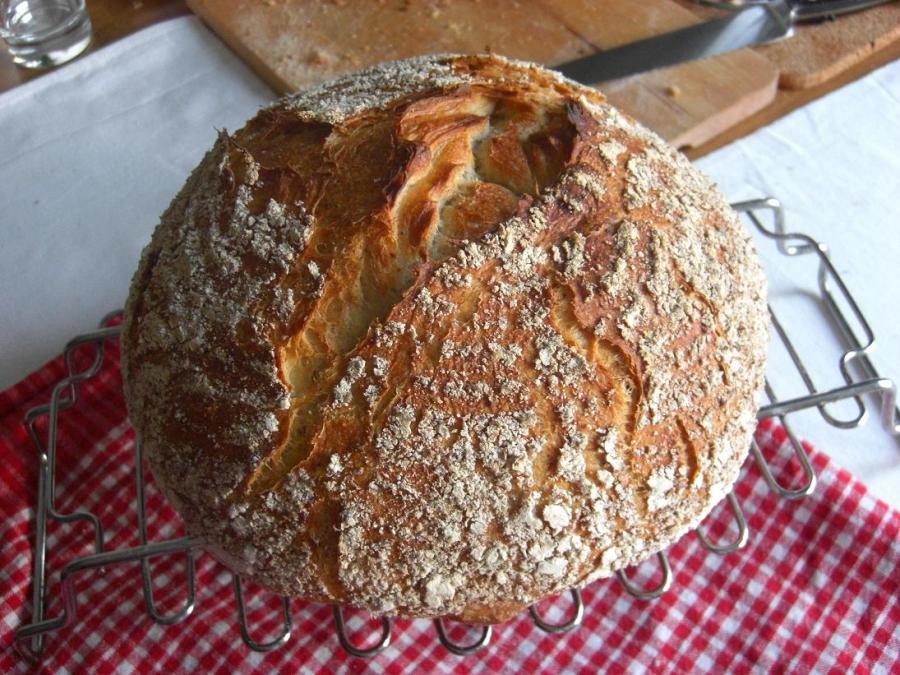
Without further ado, I proudly present to you - Stockholm Sourdough 2.0:

- Stockholm Sourdough 2.0 in all of its 1.3kg-loaf glory
First of all, yes - it is large. And yes, the crust is crunchy but not too thick, and the crumb was lovely and open and fluffy and fantastically aromatic. I'd not used bread spices before, and I have to say that I now know why they are so popular in Sweden - the bitter orange peel gave the bread a gorgeous golden tinge, and the smell is simply amazing! I have to pronounce this one a success, and since this time around I've documented the recipe as I went along (and I am retesting it today, and again later this week), I am happy to share it.
This bread uses a three-stage sourdough process, which is a lot less work than it sounds, but it does mean you have to start it a couple of days in advance. On the up side, stage 2 (levain) can be refrigerated up to a week after initial fermentation, and the final stage can be performed on the same day you pull it out of the fridge. Timing of first two stages is none too strict, and can certainly be worked around a study or work schedule.
What you need: (Makes 2 large loaves over a couple of days - or on the same day if you insist)
- A living sourdough starter (if yours is frozen or dried, you will have to reactivate it first - if it is refrigerated, it's absolutely fine as it is).
- A 2kg bag of high-protein content flour (I use 12% protein)
- 4 (2x2) teaspoons of sea salt (I use good coarse sea salt that I pound fine in a mortar and then measure it out)
- Water - cold or finger-warm. (I use cold water if I am not in a hurry, or finger-warm if I want the bread to stick to schedule.)
- Refined rapeseed or light olive oil - to oil bowls, etc.
- 6 (2x3) teaspoons of Swedish bread spices. (This is entirely optional and the bread will rise perfectly fine without these so if you dislike the idea, you can skip them, use your own mix, or another spice mix if you prefer). Swedish bread spices are a finely ground mix of:
- ground dried bitter orange peel
- star anice
- coriander seed
- fennel seed
- caraway seed.
Stage 1: Starter
If begun in the morning, it'll be ready to start stage 2 in evening.
- Take your sourdough starter (this can be cold from the fridge), and mix 2 heaping tablespoons of it with about 1dl of water and 1.5 dl of flour to fairly thick consistency.
- Scrape it into a glass jar or measuring cup, cover (I use a washed-out jam jar with a screw lid which I don't screw all the way on to allow gas exchange), and leave at room temperature for 6-18 hours (this will depend on your room temperature, how fast your starter is, etc. - but don't worry, it's not very time-critical!) until the starter has at least doubled in volume (if I do this in the morning, mine tends to be close to triple by the end of the day), and is full of bubbles.
- When it is, you can proceed to stage 2, OR you can stick it in the fridge and wait with stage 2 until it's convenient (1-3 days).
Stage 2: Levain
This takes about 5 minutes of work + 6-8 hours at room temperature - perfect to start in evening of day of stage 1, and leave overnight. Quantities given make enough levain for 2 large loaves to be baked the same day or over the next week. If you want less levain, halve the quantities, but I prefer to make a larger batch of this so that I can repeat stage 3 (final dough and baking) twice without having to go through stages 1-2 again.
- Take all of starter from stage 1 (or you can take all except 2 tablespoons which you can save if you want to keep a sample of your starter), and place in a large mixing bowl.
- Add approximately 3dl of water to the starter bit by bit, breaking the starter down as you add. If you add too much water too fast, it'll be harder to mix it. a balloon whisk helps here, but a wooden spoon will do just fine too. Continue mixing the slurry until all the water is added.
- Add 500g (that'd be 4.2 cups or 9dl) of flour, and mix until combined into a somewhat sloppy dough. You can do this with a wooden spoon, but I am lazy and use a handheld mixer with dough hooks on low speed for a few minutes.
- Oil a 2L plastic box all over the inside (including inside the lid), or a bowl, and plonk the levain into it. Cover (with said lid or some plastic wrap aka clingfilm), and leave at room temperature for 6-8 hours. Overnight works fine.
- When the levain is puffed up, you can use it right away or you can put the bowl or box in the fridge and use it at any point over the next week.
Stage 3: Final Dough and Baking - for 1 large loaf.
If you want to bake all the levain you've prepared into 2 loaves on same day, simply double the quantities of everything and divide the dough in two before final pre-shaping, shaping and proofing. Note that if you are proofing in banettons, you will need 2 banettons large enough to hold ~1.3kg of dough each. I would recommend baking the breads sequentially, as most house ovens won't fit two of those at one time, and placing one of them into a refrigerator to finish proofing about 2.5 hours into final proof to avoid over-proofing it while the first loaf bakes. I normally bake one loaf immediately and the other one the day after or a few days after.
- Measure out 500g flour and the 3 teaspoons of spices (if using) into a mixing bowl and mix with a dry whisk to combine.
- Slowly add the water while mixing with a wooden spoon or a mixer with dough hooks until the dough comes together (it will be fairly stiff and you may need to use your hands towards the end if you have started with a spoon). Cover with plastic wrap (clingfilm) and leave for at least 15 minutes (30 min won't hurt it either) to autolyze (let the flour absorb water).
- Sprinkle 2 teaspoons of salt over the dough.
- Take ~400g (about half of Stage 2 recipe) levain and add it to the same bowl (or all the levain if doubling quantities for 2 loaves together).
- Mix together to incorporate levain and salt into the dough. This really is easier with a mixer, otherwise you will need to knead it together, but only enough to mix - kneading is not used in this recipe for gluten development. Shape the dough into a rough ball.
- Place the dough into a cleaned and oiled bowl and turn to coat in oil. Cover with plastic wrap.
- Bulk fermentation of the dough at this point is about 3-4 hours. I do a stretch-and-fold every 1 hour starting at 30 minutes after mixing, and stop when the dough is pillowy and doubled in bulk. Some people do this on an oiled surface, but I find i can just lift the dough out of the bowl with lightly oiled hands, let it stretch as it hangs, and fold it in my hands, then place it back into the bowl - easy!
- After 3-4 hours, the dough will be soft and fluffy and will have doubled in bulk. If using 2x quantities for 2 loaves, here is where you cut it in half and proceed as follows. If you are using half the levain for 1 loaf, no need to cut the dough.
- Take your dough and place it on a lightly floured surface. It should be soft and very elastic and not really very sticky at this point.
- Gently fold and preshape it into a boule, place on a well-floured spot on the surface and cover. Allow to rest for 10-15 minutes.
- In the meantime, dust your banetton with flour. I use a little bit of regular wheat flour and then some wholemeal coarsely ground flour on it. Or you can flour a kitchen towel and line a large bowl with it instead. Note: more flour is better than less - you really don't want this sucker to stick. Dough stuck in banetton or towel = utter misery. I speak from experience.
- Finish shaping your dough into a ball by stretching the surface and gently tucking the ends underneat it, then pinch the bottom seam shut and place the dough ball into the floured banetton OR the floured-towel lined bowl seam side down.
- Preheat your oven with the cast-iron casserole dish inside to 250°C. If your dish is deep enough for the bread, preheat the lid too (make sure your knob is heatproof to the required temperature!). Note, the cast iron will be very hot - please read tips and cautions about baking in a cast-iron dutch oven/casserole dish here. For this loaf, I used a shallow round casserole bottom and a stainless-steel bowl for top since the lid was too flat to contain the bread in the shallow dish. Do not preheat the stainless-steel bowl if you will use that.
- Cover and allow to proof for 1-1.5 hours until the dough has close to doubled or doubled in bulk and passes the poke test. (Poke test - poke dough with a finger, the surface should not bounce back immediately, but should rise up again very slowly.)
- When the time has elapsed, oven is preheated, and the dough passes the poke test, uncover the banetton or bowl, place a piece of baking parchment over the opening and hold it tightly - then quickly invert the banetton/bowl onto a counter or table so that the bread ends up on your baking parchment. Lift the banetton or bowl+towel off.
- Since you proofed seam-side down, it's now up so there is no need to slash the bread - it will open up in a natural pattern.
- Using thick oven mitts, take the very hot dutch oven or casserole bottom out of the oven and put it on a surface covered with a wooden cutting board or something else large and heatproof and non-slippery. Pick up the baking parchment with your dough and gently place it into the very hot cast-iron dish. Cover with a stainless steel bowl, or if the dish is deep enough, its own lid also works fine (in which case I recommend preheating the lid too).
- Place the covered dish back in the 250°C oven, and bake for 25 minutes covered. Then remove the cover (whether it's lid or bowl - if it is a bowl, you may need to use a butter knife or such to pull it up before you can grab it with an oven-mitted hand), reduce heat to 210 or 220°C and bake for further 25-35 minutes until the crust is deep golden-brown. This is a large loaf so 50-60 minute baking time is not unusual, and you don't want it to end up underbaked.
- Cool on a rack for at least 1 hour or until entirely cool to touch before cutting. I failed at this last one and cut it while still warm because it was dinnertime and we were hungry - but the crumb will be even prettier if you wait. Trust me.

- Crumb very slightly squished due to cutting while still warm
Bake, eat, enjoy!
_________________________
Addition - photo of this morning's re-test of the recipe (not cut as going to give this one away as a gift).

Already a member? Login